I am ALWAYS looking for interesting ways to store my jewelry so it doesn't all end up in a huge heap on my dresser. I kept thinking of something portable that I could hang inside a closet door or on the wall, something with handles for necklaces and holes for earrings, and I knew I would have to make it myself.... so I googled 'necklace holder' or ''earring organizer' or something one day, and came across a LOT of fellow crafty gals with similar ideas. I loved the concept of using a photo frame because that solves the portability issue and you can determine what size works best for you. Soooo, I decided to create my own version of the photo frame - jewelry holder/organizer. Instead of using mesh like a lot of the diy's I came across, I decided to use cork, and it turned out fab, if I do say so myself :)
Advantage to creating your own jewelry organizer?
You can customize it to suit the type of baubles you own. If like me, you wear a lot of hoops and dangling earrings, you need something with enough room to both store and showcase your pieces, so you don't end up wearing the same pieces over and over again cos you can't see what you have
I got the photo frame at the Game (Palms Shopping mall), I've had the cork sheet about 3 years or more from Pearl Paint, and I got the mini hooks/screws at the Game as well.
Added bonus - it took less than an hour. I love quick diy's!
SUPPLIES
1) Frame 2) Decorative paper 3) Tape/glue 4) Mini hooks 5) Cork sheet 6) Ruler
7) Craft knife 8) Scissors
HOW-TO
STEP 1 : Take the photo frame apart. The glass isn't going to be part of the finished product, so i'm saving it for another DIY project. At this point you only need the mat frame.
STEP 2: To 'pretty-up' it up, I decided to wrap the mat frame with decorative paper (the paper I ended up using is different from the one pictured above). So placing the mat frame on my paper (both face-down), I cut a .75 -1 inch border around the frame.
Step 3: Secure the mat to the decorative sheet with a little tape, to stop it from moving around
and draw an 'X' using the opposite corners of the rectangle on the inside of the frame
Step 4: Then I cut along the 'X' lines with a craft knife, making sure to have
a clean cut from one end to the other
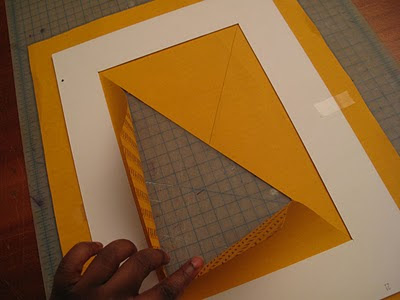 |
| This creates the 'window' |
Step 5: Cut off the corner squares on all 4 sides
Step 6: Begin folding back the middle 'X' flaps and the 1 inch border.
Cut off any excess paper and tape/glue the paper down
 |
| One side folded and taped, do the same all around |
 |
When finished it should look like this. (This is the backside of the mat frame,
so it doesn't need to look perfect) |
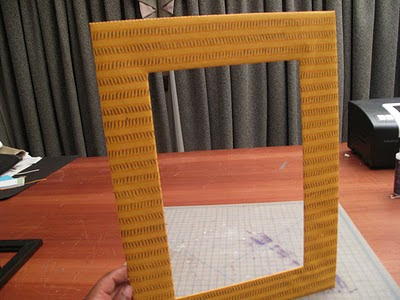 |
| Front view |
Step 7: Once you have finished wrapping the mat frame, it's time to pop it back
into the main photo frame. *Remember the glass isn't going back in.
After placing the mat frame, position the cork sheet over the 'window' or opening.
Add the layer/board that came with the frame and secure the back
ADDING THE HOOKS
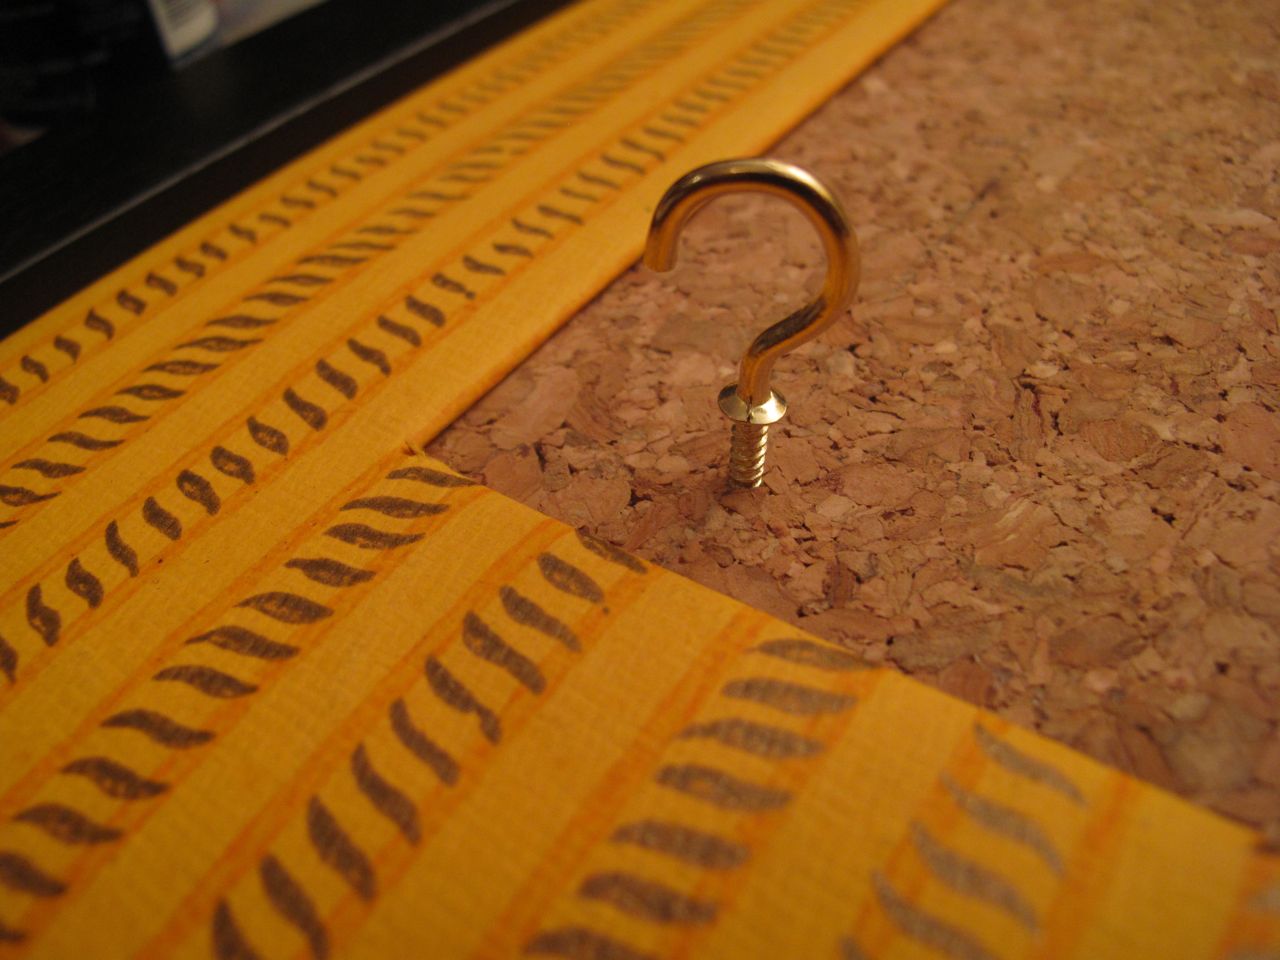
Draw a guideline for where you want to place the hooks. I am using hooks
that can be screwed into the cork by hand.
Screw in the hook until it is flush with the cork and you can feel it is firmly in place.
Continue placing your hooks at measured intervals
( I left approx 2inches between the hooks)
Using a pair of hoops as my guideline, I drew a line for the next row of hooks/screws, keep going until you fill the space. (I initially considered covering the cork sheet with a complimentary decorative paper, but I like the look of the cork with the yellow, so I left it as is)
That's it. You're finished and your jewelry organizer is ready!
HANGING ON THE WALL
HANGING INSIDE MY WARDROBE
Quick and easy storage solution. I have a feeling i'll be making more of these in many different variations!
Here are a few links to some of my faves:
http://www.designspongeonline.com/2010/01/diy-project-hidden-jewelry-box.html
http://www.thethingaboutdaisies.com/2010/02/diy-jewelry-holder-how-to.html
http://www.designspongeonline.com/2008/01/diy-project-jewelry-shadowbox.html